Schools can schedule your school timetable for online learning along-with a daily/ weekly and monthly calendar using the Academic Calendar option. To access calendar, from the Nucleus dashboard navigate to School Administrator > School setup > Academic calendar
Schools can also set up school holidays and events on this calendar.
Nucleus will start a quick tutorial when the school opens the Academic Calendar for the first time. Follow on screen instructions to complete the tutorial and read the information carefully.
This tutorial will inform schools regarding all features of the academic calendar which will help them to set up the Academic Calendar.
Click on the Skip Tutorial button to stop the tutorial at any time.
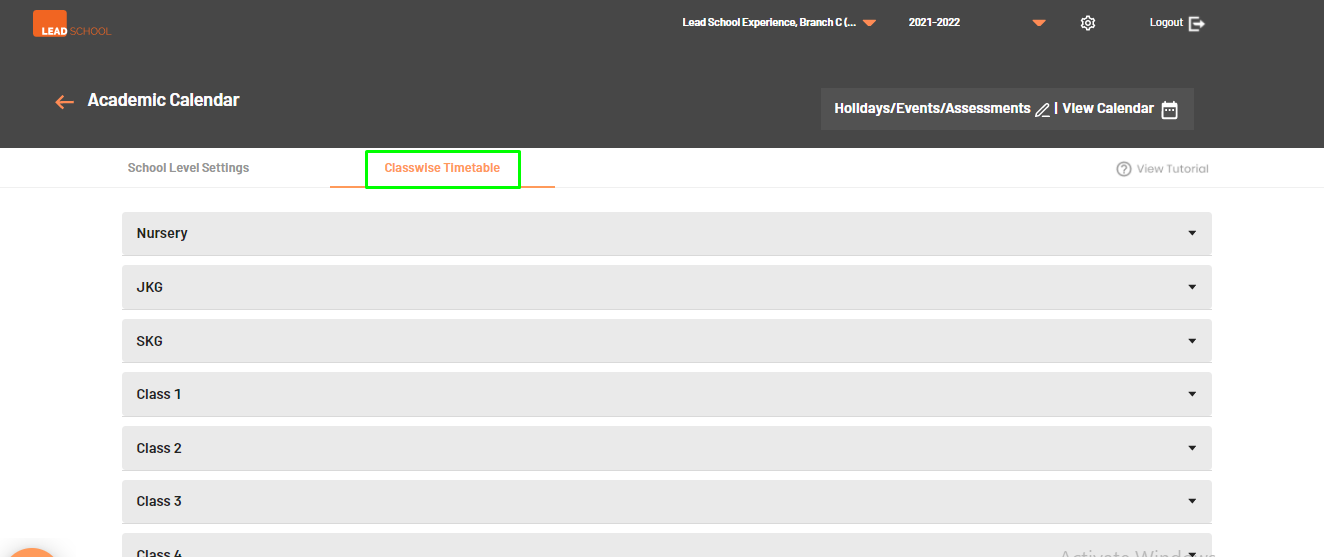
Under Academic calendar school can set up online classes for the entire school from the School Level Settings. To schedule class-wise online learning, click the Classwise Timetable option.
Click the Holidays/Events/Assessment option to add school holidays in the calendar. Click the View Calendar option to view schedule on the Daily basis (class wise) or Weekly view or monthly view of academic calendar.
School Level Settings
Using School Level Settings schools can schedule and set up their online classes, regular classes days and Lead School@Home classes. They can also set up their online classes preferences using this option.
School Configuration
Click on School Configuration to expand below mentioned configuration options.
Setup School Start date and End date using Academic Year Start Date option.
Select School mode between Online (Online classes only) or Hybrid (Mixture of both Online classes & regular classes).
Schools can select the start date and end date of online or hybrid classes as well.
Select the learning days in week as per school preference. By default all weekdays are selected.
Select subjects for online classes using the drop down menu under Active Subjects option. School will see all available subjects for the school and can select or remove subjects.
Schools can set up their own YouTube channel for schools own online classes (recorded or live streaming) using the School Youtube Channel URL option.
Click the Need Guidance option to know more about how to create a new Google account and set up the YouTube channel.
Click Save to save all changes. Click Cancel to undo all changes.
Lead School@Home Content Schedule
Using this feature, schools can set up and if required change the Lead School@Home classes schedule.
Click Set Start Date option to select the start date for Lead School@Home classes.
Schools can change the start date once they save the configuration.
Click Pause Lead School@Home option to stop the classes.
Schools can also select the date when they want to resume the Lead School@Home classes.
Schools can select the language Preference option. Currently schools can select between English and Hindi.
Schools can also configure whether they want students to view Student readers and Workbooks online on the Student App using the Enable Digital Books option.
If diabled, students cannot see any books on the Student App.
Click Save to save all changes. Click Cancel to undo all changes.
Class wise time table
Using the Class wise Timetable option, schools can schedule class wise online or hybrid learning options. All classes including ELGA classes are visible on this page.
You can start by expanding any class you would like to configure first.
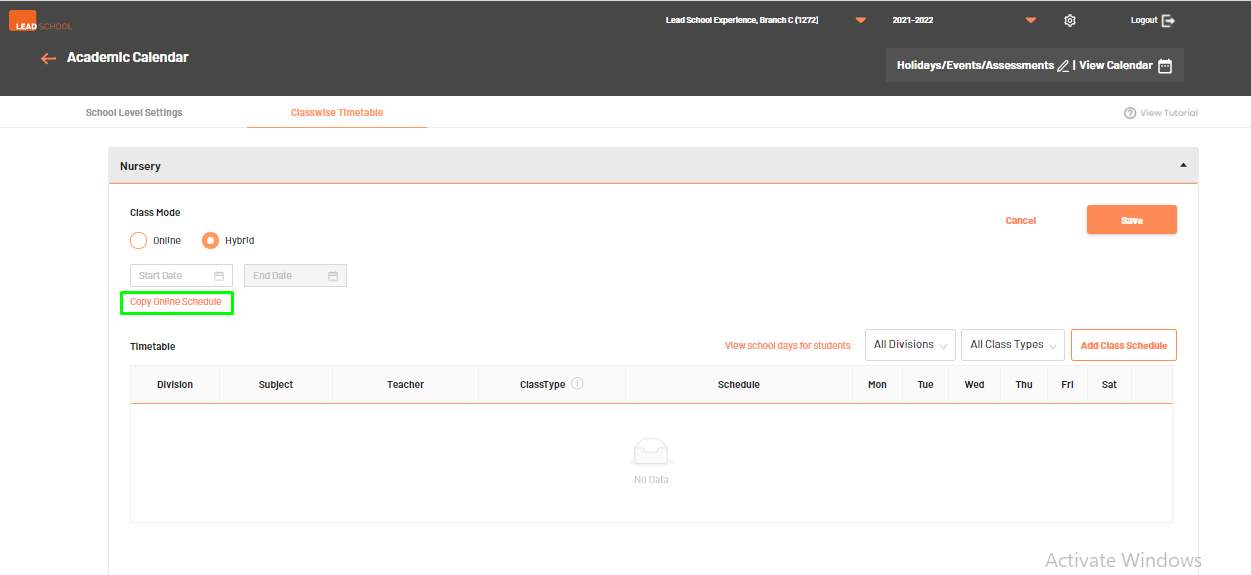
Choose Class Mode type as per your preference from Online mode or Hybrid mode.
With Online mode you can only set up online classes such as LeadSchool@Home & MyClass@Home classes.
With Hybrid mode you can set up @School classes along with online classes as well.
Pick up start date for selected learning day.
When you’re selecting the Hybrid Mode option for the first time,
you’ll get an option to copy schedules from online classes. Click the Copy Online Schedule option for the same.
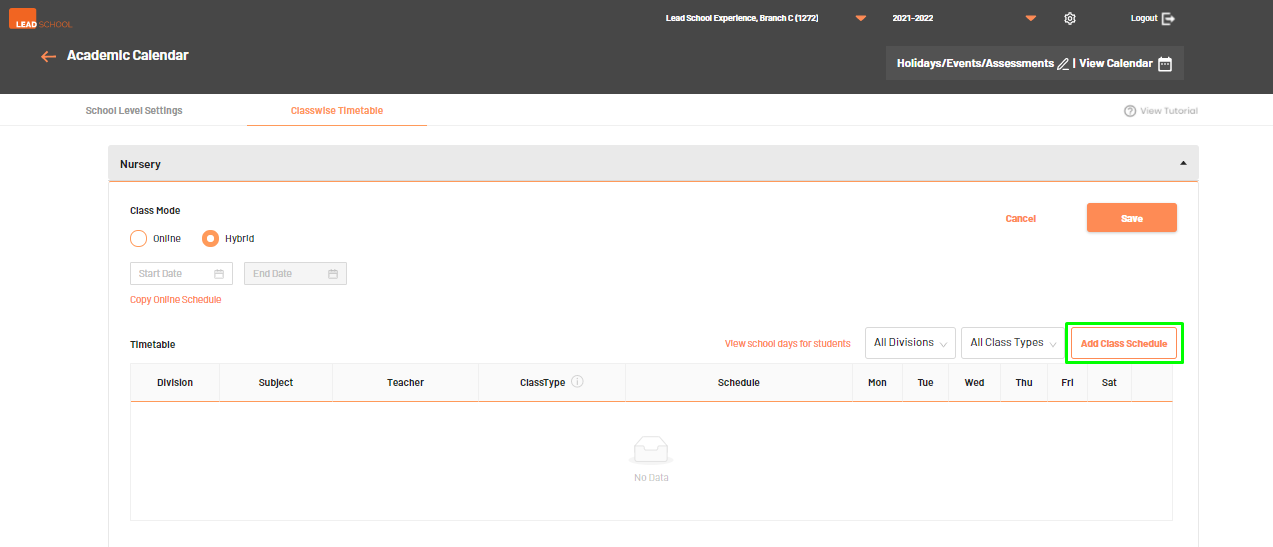
To add MyClass@Home classes or @School class schedule, click Add Class schedule button.
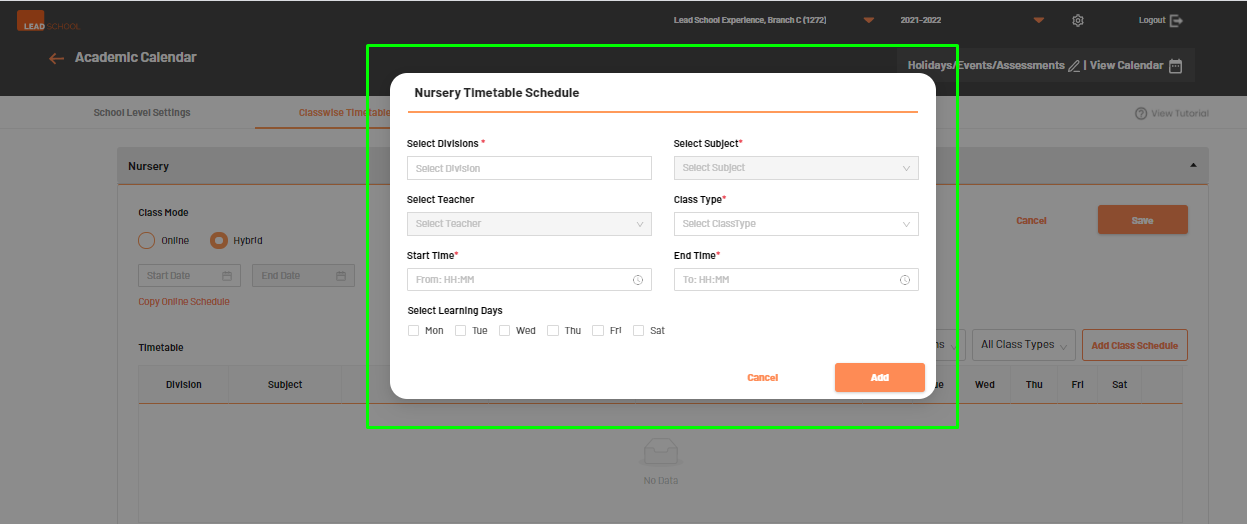
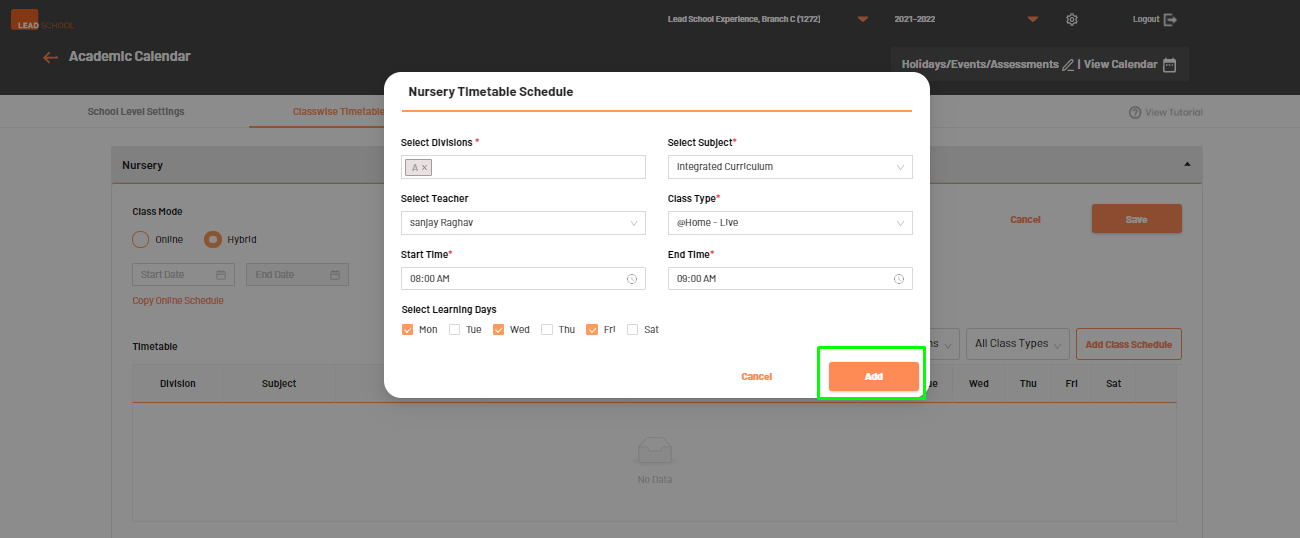
It will open a new popup window.
Select Divisions you want to set up, Subject, Teacher name,
Class Type, Class start time, End time & Learning days as per your preference.
When completed, click the Add button
Use Division & Class filter option to simplify the view & check if there are any conflicts with other subjects or divisions.
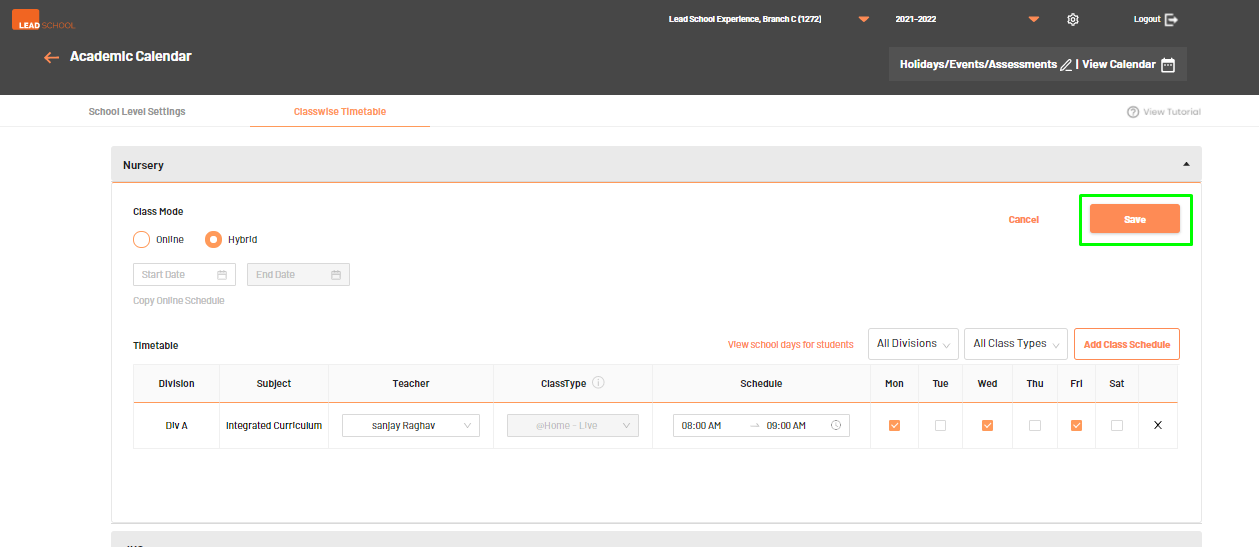
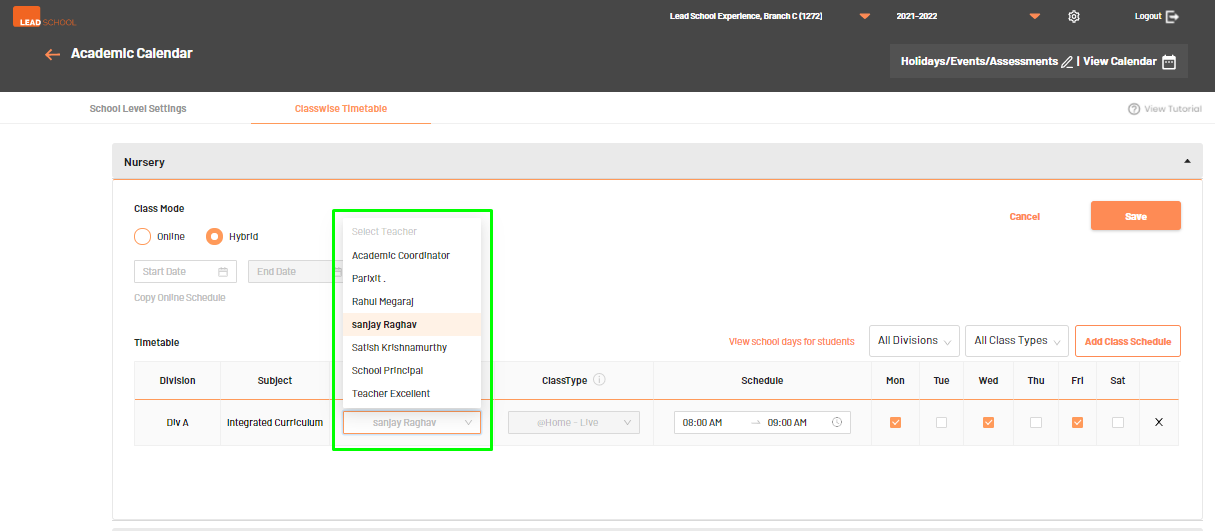
You can also update the teacher assigned to any class or change class start & end time or select learning days for any class.
If Hybrid mode is selected, you also get an option to schedule @School learning days for students of each division from the selected class.
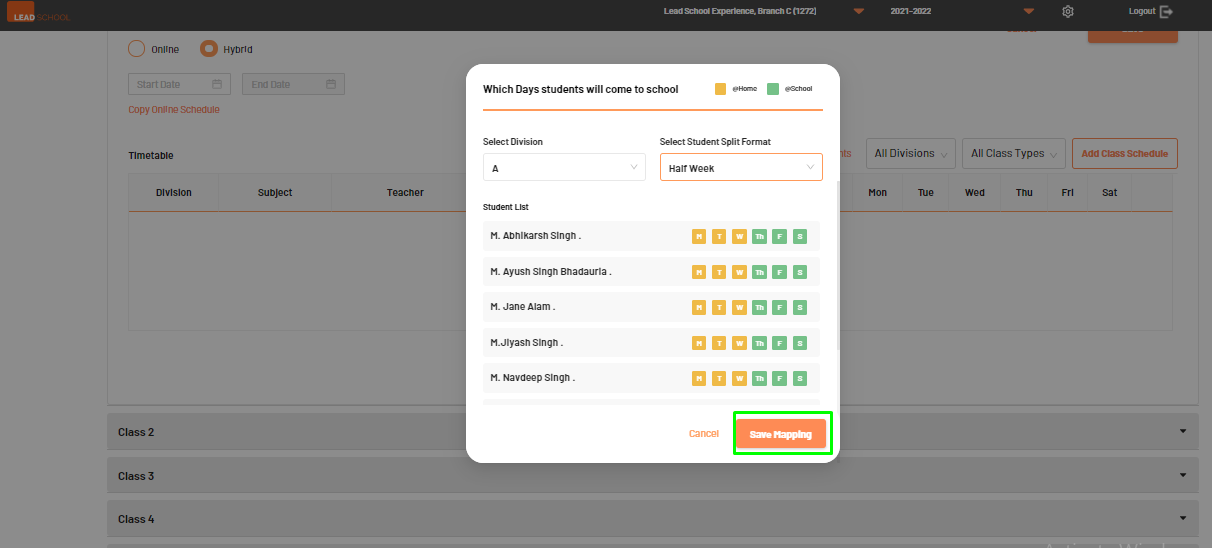
Click View school days for students option. It will open a new popup window.
Select the division you want to configure first. It will show current students’ learning days mapping.
For convenience we have provided three options to split students of selected division for School learning days & online learning days. Select any option as per your preference.
Alternate day-50% of the students will be assigned to Odd numbers while remaining 50% students will be assigned to even numbers of the week for @School classes.
Half week -50% of the students will be assigned the first 3 days of the week while remaining 50% students will be assigned to remaining days of the week for @School classes.
Weekly mappingAll students of the selected division will be assigned to the @School classes for selected learning days. You can set up different @School learning days for each division as per your preference.
However if school wants they can also set up @School learning days for each student or all students manually as well.
When mapping for the selected class is completed, click the Save mapping button.
Click the Save button for the selected class to save all the addition and/or changes made in the class-wise timetable.
Holidays/Events:
Click on Holidays/Event option to set up or change Holidays or events.
It will open the Holidays tab.
Click on the Add Holiday button to add a new Holiday. It will open a popup window.
As per your preference type Holiday description, select Holiday start & end date.
In Applicable To option, you can select whether the holiday is applicable for students only or for all (Students & staff).
You can also decide whether the holiday is applicable for all classes or few selected classes by clicking the Select Classes option.
Click the Save button to create the Holiday.
You can also edit or delete already created holidays at least 1 day before the holiday starts.
Click the Edit button next to the Holiday. It will open the popup window with the holiday details.
Make required changes and click the Save button.
To delete the holiday, click the Delete button.
To set up the event, click the Events tab on the same page.
Click on the Add Event button to add a new Holiday. It will open a popup window.
As per your preference select Event type from drop down menu, type Event description, select Event start & end date.
You can also decide whether the event is applicable for all classes or few selected classes by clicking the Select Classes option.
Click the Save button to create the Event.
You can also edit or delete already created events at least 1 day before the event starts.
Click the Edit button next to the Event. It will open the popup window with the event details.
Make required changes and click the Save button.
To delete the event, click the Delete button.
Click the back button to go back to the Academic Calendar home page.
View School Calendar
Click View Calendar option to view the school calendar after you’ve finished setting up class schedules & holidays/events.
It will open the current week’s schedule based on the setup.
Use the filter options to view schedule for future or past date, regular classes or ELGA classes schedule, schedule for a specific grade or an ELGA level.
You can even filter the schedule based on class type or a specific subject or schedule for a specific teacher.
You can also configure or change MyClass@Home classes for a specific day. Click on the MyClass@Home class you want to set up or change. It will open a new popup window.
As per your preference enter Class topic, description & the class link.
You can save the settings with above mentioned fields entered. However if required, you can also set up homework and/or assessment.