ASM can be created with assigned subjects by principle. Principals also need to assign the subject for self if he/she wants to create an assessment for any class.
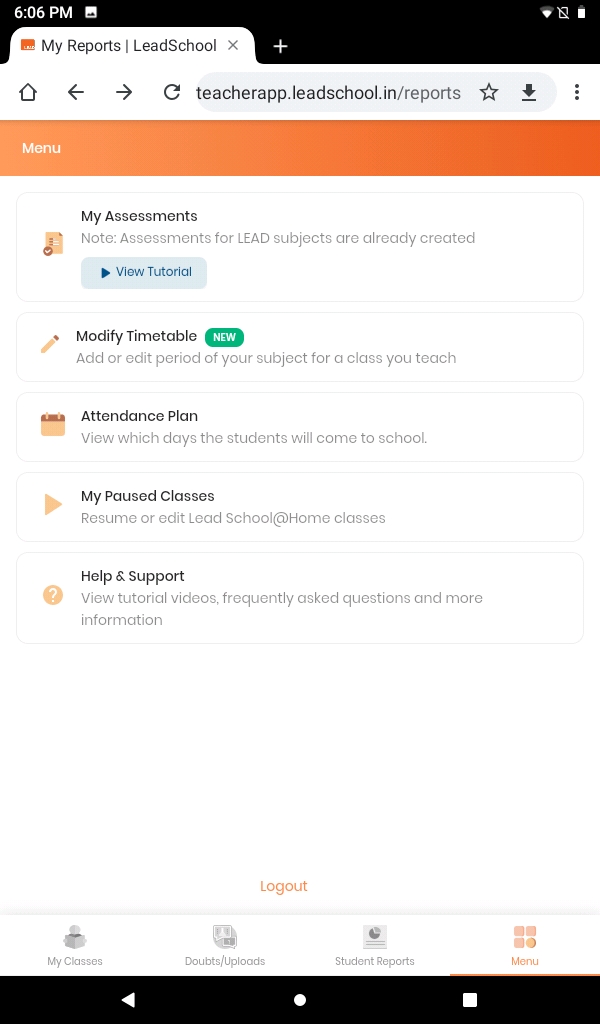
Step 1: Click on the Menu and select My Assessment. Click on View Tutorial to check the steps on how to create assessments.
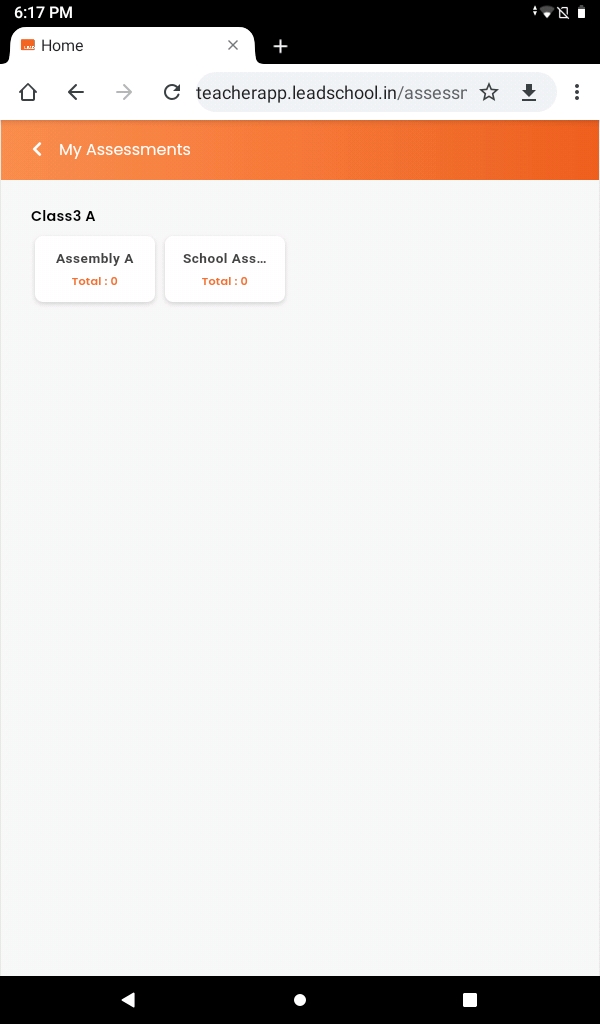
Step 2: Click on the subject you want to create an assessment for.
Step 3: After selecting the class click on the Add Assessment button to create assessments. Earlier created assessments will be shown here.
Step 4:
Select Class, Subject, Assessment Type from the drop down.
Create a short name for the assessment name which should contain 5 alphabets or numbers. This name should be unique.
Enter Assessment Name and Assessment Description.
Enter the date for the assessment.
Click on SAVE.
.
Step 5: Existing assessment can be checked after selecting class.
Click on the Edit if you want to change the details of the assessment.
Future scheduled assessment will show as Scheduled.
If the assessment has been sent to students then the scheduled batch will change to Sent to Students.
Date present on the assessment shows when the assessment is going to start.
Click on the three dots to Copy or Delete the existing assessment.
If you copy the assessment then questions and answers as well get copies to the new assessment.
If students have not started the assessment then that assessment will show Not Started.
If any student has started the assessment then the assessment will change to Ongoing.
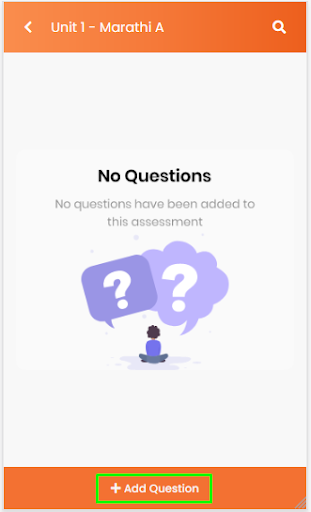
Step 6: After creating an assessment now it's time to add the questions and answers.
Click on the Assessment you created.
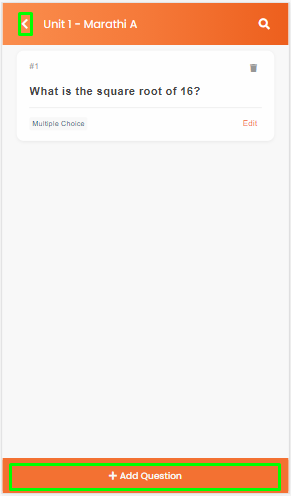
Click on the + Add Question button.
Step 7: Now we are going to create questions and answers. Teachers can create questions in multiple languages as well.
Now to create a question, enter the question in the Question Editor.
Teachers have various formatting tools to make questions more presentable.
Teachers can also add images as well in question by clicking on the Image icon.
If the teacher wants to create any formula for the question then click on the appropriate formatting icon and enter data.
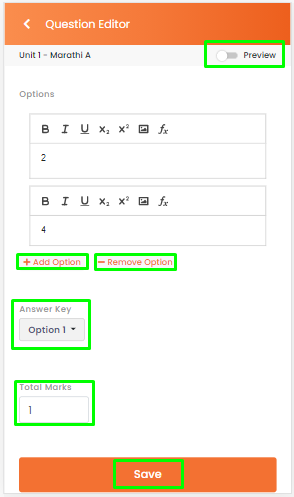
Click on the Preview button to check out how this question is going to look when the student sees this.
Step 8: Till now we have created a question and now we are going to create answers and marks for correct answers.
Enter answers on each option box.
We have editing tools to create or upload images on options as well.
By default we have 2 options created on each question, if you want to create more options then click on +Add Option.
If you want to remove the options then click on -Remove Option.
If you clicked on -Remove Option then option removal will only happen by descending order.
Now select the correct answer from the Answer Key drop down.
Enter marks in the Total Marks box. The student will get entered marks after selecting the correct answer.
Click on the Preview button to check out how this question is going to look when the student sees this.
After completing the all click on SAVE to complete the question.
Step 9: Teachers can create as many questions as they want and each question can have multiple options as well.
Click on the +Add Question button if you want to create a new question again.
Or click on the back button to back the previous menu.